big-image
small-image

Santa Rosa Plum Tree

 
$67.00
+ Gift Wrapping
VARIETY INFO
SHIPPING
TREE SIZES


Santa Rosa Plum- Variety Information 

  • Each bite of the Santa Rosa Plum is a mouthwatering experience that triggers shockwaves of sweet, tart & fragrant fruity flavor.
  • Most popular plum in California and Arizona.
  • Originating in Santa Rosa California where plant breeder Luther Burbank crossed Japanese and European varieties to produce the Santa Rosa Plum.
  • Juicy, tangy, and flavorful.
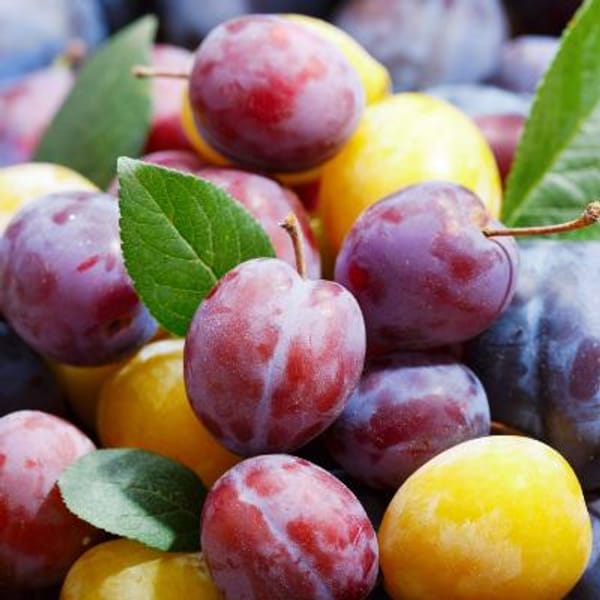
  • Fruit is large, dark reddish-purple, with rich, tart, fragrant yellow-amber flesh.
  • Trees will display spectacular white-pink blossoms in the spring.
  • Self-fruitful
  • Vigorous and prolific.
  • Grafted onto Citation rootstock
  • USDA Zone 5-10, Requires 250 chill hours to set fruit. Protect when temperatures fall below -10°F.
  • Approximate harvest period (for Central CA): June / July.


  • No customer pick-up
  • We can ship our "Other Edibles" (non-citrus plants) and growing accessories to most states, including Alabama, Texas, Arizona or Florida. 
  • Sorry, we do not ship any items to the US Virgin Islands, Guam, Puerto Rico or to API/APO addresses, or to other countries at this time.
  • Click here for Shipping Information


Potted:

  • The trees are approximately 2 years old.
  • Tree measures 3'-4' tall
  • Our trees are measured by trunk caliper.
  • Trunk size may vary slightly based on availability during the season.
  • Average trunk size is 1/2"-5/8".

How to Grow

conditions-1-title Icon
Location

Immediately upon receiving a bare root tree, remove it from its box to make sure to inspect the roots and see that they are still moist. One way to keep roots damp is to give the roots a quick rinse and repack them in the packing material in which they arrived until you are ready to plant. Alternatively, the use of autumn leaves, wood chips, or even shredded newspaper will keep the roots damp until you are ready to plant.

Note that the roots should be fully covered and kept moist until you are ready to plant. Keep your tree cool (ideally between 30° and 40°F) to prevent the tree from breaking its dormancy until you are ready to plant. After wrapping the roots in packing material and plastic to hold in moisture, put the plant in a cool place away from the sun. Another way to hold a tree in good condition before planting is to heal it in. On the cooler side of your house, dig a shallow hole that is just deep enough for the roots and temporarily plant the tree there.

Just before planting time, inspect a tree’s roots, removing any that are dead, damaged, or diseased. Cleanly cutting frayed ends reduces the surface area of wounds, so that healing is quicker, and the risk of root damage is reduced. Keep the roots from drying out when taking a tree to its planting site by keeping it wrapped in moist cloth or newspaper.

conditions-2-title Icon
Planting

Prepare your planting site by digging a hole about twice the volume of your tree pot. If you notice that your soil is very hard, now would be the ideal time to perform a drainage test. You can test your soil drainage by filling the hole with water. If the hole takes more than 2 hours to drain completely then your soil is poor draining and will need to be amended. If your location is heavy in clay soil that drains poorly, consider mounding up above the native soil with compost and mulch and then planting in your well-draining mound. Once the hole has been dug, backfill with a 50/50 mix of compost and native soil so that the tree can sit flush with the native soil level.

Once your hole is prepped, you will want to press the tree pot sides and gently remove the tree from its container. Once removed, gently loosen the sides & bottom of the root mass with your hands. Then place the tree in the planting hole and backfill with more of your 50/50 compost and native soil mix. This mix is important to create a buffer zone of soil that is easy for your tree to root into while also introducing the roots to your native soil.

Now that your new tree is planted, it is time to give the trees a thorough soak. This step is very important to close any air gaps that may have been created while backfilling the tree.

conditions-4-title Icon
Post Planting Tree Care

Prune the canopy of your tree at this time. The goal here is to have a canopy that is roughly as large as your root mass. By balancing the root mass with the canopy, you will see much less dieback on your branches and a higher success rate with your new tree. If you want the fruiting wood to begin low, smaller trees may be cut back at planting time to a height as low as the knee (15-20 inches). Any remaining side limbs should be cut back to one or two buds. Larger trees may be cut above existing well-placed low limbs, or they too may be cut back low to force new, lower limbs. If this step is skipped, you will likely see low vigor from the first season, dieback from these long branches, or even complete failure to break dormancy. Protect the trunk of your tree from sunburn, pests, and insects with IV Organics Plant Guard tree paint and foliar spray. Paint your newly planted tree from the ground up. This step is particularly important for our growers in the southwest where the climate and the intense sun tend to damage trees.

Spread 3"- 5” of wood chips or straw over the bare ground. Keep mulch away from the trunk to prevent the trunk from rotting. This insulating blanket will keep the roots of the trees warm and growing and prevent freezing and thawing of the soil. It will also keep the roots of the trees cool and moist through summer.

Stake trees that stand over 3' tall or in very windy areas for at least a year until their roots grab a firm hold of the soil. Tie the trunk to one or two stakes set beside the tree, using some soft material or padded wire. Allow for some movement of the trunk.

{